Explore stunning photography

Mastering Light in Photography: A Complete Guide for Beginners
Light is the foundation of photography — it shapes mood, adds depth, and guides the viewer’s eye. This beginner-friendly guide explores natural and artificial light, how direction and quality affect your shots, and simple techniques you can use with any camera. Perfect for anyone looking to take their photography to the next level by learning to truly see and use light.
9/30/20253 min read

Mastering Light in Photography: A Complete Guide for Beginners
Photography, at its core, is the art of capturing light. Without light, there is no image — and how you use it determines whether your photos look flat and dull or vibrant and professional. While cameras, lenses, and editing tools all play a role, light is the one element that can completely transform your photography.
In this guide, we’ll explore the different types of light, how to work with natural and artificial lighting, and practical tips for mastering light in everyday photography. Whether you shoot with a phone, a mirrorless, or a DSLR, understanding light will take your work to the next level.
1. Why Light Matters in Photography
Before diving into techniques, it’s important to understand why light is so crucial:
Defines Mood → Soft light creates calmness, while harsh light adds drama.
Shapes Subjects → Shadows and highlights give your subject depth and dimension.
Guides Attention → The brightest part of an image often draws the viewer’s eye.
Reveals Detail → Proper lighting brings out textures and fine details.
Once you understand how light works, you’ll start noticing it everywhere — and using it intentionally in your photos.
2. Natural Light: Your Best Starting Point
Natural light is free, abundant, and versatile. Learning how to use it effectively will elevate your images instantly.
Golden Hour (Sunrise & Sunset) → Warm, soft light ideal for portraits and landscapes.
Blue Hour (Before Sunrise & After Sunset) → Cool, moody tones perfect for cityscapes and night photography.
Overcast Days → Diffused light eliminates harsh shadows, great for portraits and product shots.
Window Light → Indoor natural light creates flattering portraits with depth.
Pro Tip: Move your subject around. A slight change in angle can dramatically alter how light hits them.
3. Direction of Light
It’s not just the quality of light that matters, but also the direction it comes from:
Front Light → Illuminates the subject evenly; great for beginners, but can look flat.
Side Light → Creates strong shadows and highlights, adding depth and drama.
Back Light → Produces silhouettes or glowing outlines (perfect for sunsets).
Top Light → Harsh and unflattering on faces (think midday sun). Use carefully.
👉 Experiment with changing your position relative to the light source to see how it changes the photo’s mood.
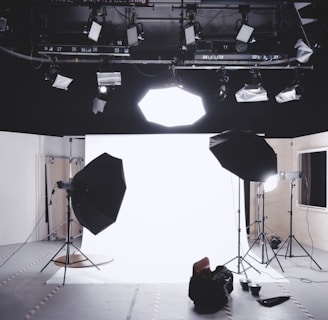
4. Artificial Light: Expanding Your Control
When natural light isn’t enough, artificial light gives you flexibility:
LED Panels → Affordable, portable, and adjustable for color temperature.
Ring Lights → Even, flattering light for portraits and product shots.
Speedlights/Flashes → Great for freezing motion and filling shadows.
Studio Lights → Professional setups with softboxes or umbrellas for controlled environments.
Don’t be intimidated by gear — even a desk lamp can create beautiful results if used creatively.
5. Understanding Light Quality
Light isn’t just bright or dark — its quality changes how a photo feels.
Soft Light → Diffused, wraps gently around the subject, flattering for portraits.
Hard Light → Direct, creates strong shadows, dramatic and high-contrast.
Warm Light → Adds coziness and emotion.
Cool Light → Feels calm, distant, or moody.
To soften harsh light, use curtains, white sheets, or a reflector. To make light harder, remove diffusion or use direct sources.
6. Common Lighting Techniques
Here are some classic setups you can use even with basic tools:
Rembrandt Lighting → Side lighting with a triangle of light under one eye; dramatic and timeless.
Split Lighting → Half the face in shadow, half in light; bold and edgy.
Butterfly Lighting → Light directly in front and above; creates a butterfly-shaped shadow under the nose (popular in beauty shots).
Silhouette → Place your subject in front of a strong light source for striking outlines.
These techniques are not just for studios — you can replicate them with natural light too.
7. Tips for Better Lighting with Any Camera
Always observe light before shooting; ask “where is it coming from?”
Avoid using your phone’s direct flash; it creates harsh, unflattering results.
Use reflectors (or even white paper/foil) to bounce light onto your subject.
Move, don’t zoom — your position relative to the light matters more than the lens.
Embrace shadows. They add character and contrast to your photos.
8. Practice: Training Your Eye for Light
Improving your photography isn’t just about reading tips — it’s about observing and practicing. Try these exercises:
Take the same subject at different times of day to see how light changes.
Experiment with backlit subjects to create silhouettes.
Shoot a portrait near a window, then move around to see how side vs. front lighting changes the mood.
Try editing photos to understand how much can be enhanced — and where natural light does the job better.
Over time, you’ll develop an instinct for where to place your subject, yourself, and your camera.
Final Thought
Lighting is the heart of photography. It shapes stories, emotions, and perspectives more than any gear upgrade ever could. Mastering light doesn’t require expensive equipment — just awareness, creativity, and practice.
Next time you take out your camera or phone, don’t just look at your subject — look at the light. Notice its direction, quality, and color. Ask yourself: How can I use this to tell a stronger story?
Because in the end, great photography isn’t about chasing the perfect moment — it’s about learning to see the light that’s already there.

Explore
Discover stunning photography and high-resolution downloads.
Connect
Inspire
© Tatvaaa 2025. All rights reserved.